
Pictures and a description of the process.
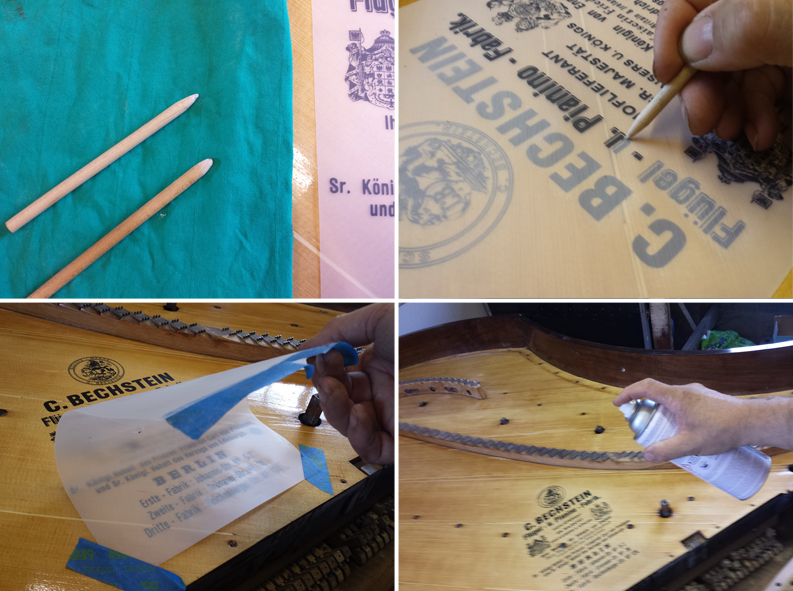
Additional tools needed : Stylus, Masking Tape and Spray Sealant.
First and foremost it’s important to make sure the sheet is handled as carefully as possible, no not shake, bend or lay the exposed application side against any other surface than the surface used at time of application. The decals (transfers) are similar to the traditional rub down letter transfers popular in the 1970/80’s. They are easy to apply and just require a clean flat surface.
Remove the backing paper and while handling very carefully, position the transfer directly over the place it needs to be. Use masking tape all along top edge and at each corner at the bottom to hold in place. Avoid moving the transfer whilst it is against the soundboard as letters may become detached. Transfers are usually applied after the first or second coat of sealant and after a light rubbing down. Apply with a sharpened then blunted hammer shank or similar (pens and pencils are not suitable as the marks they leave will make it hard to see which parts have or have not transferred). After application, mist over with a spray sealant, mist very lightly, about 3 times with a good wait in between. Misting too heavily will spoil the final finish in the area of the transfer. After the recommended drying time a top coat/finish should then be applied.
